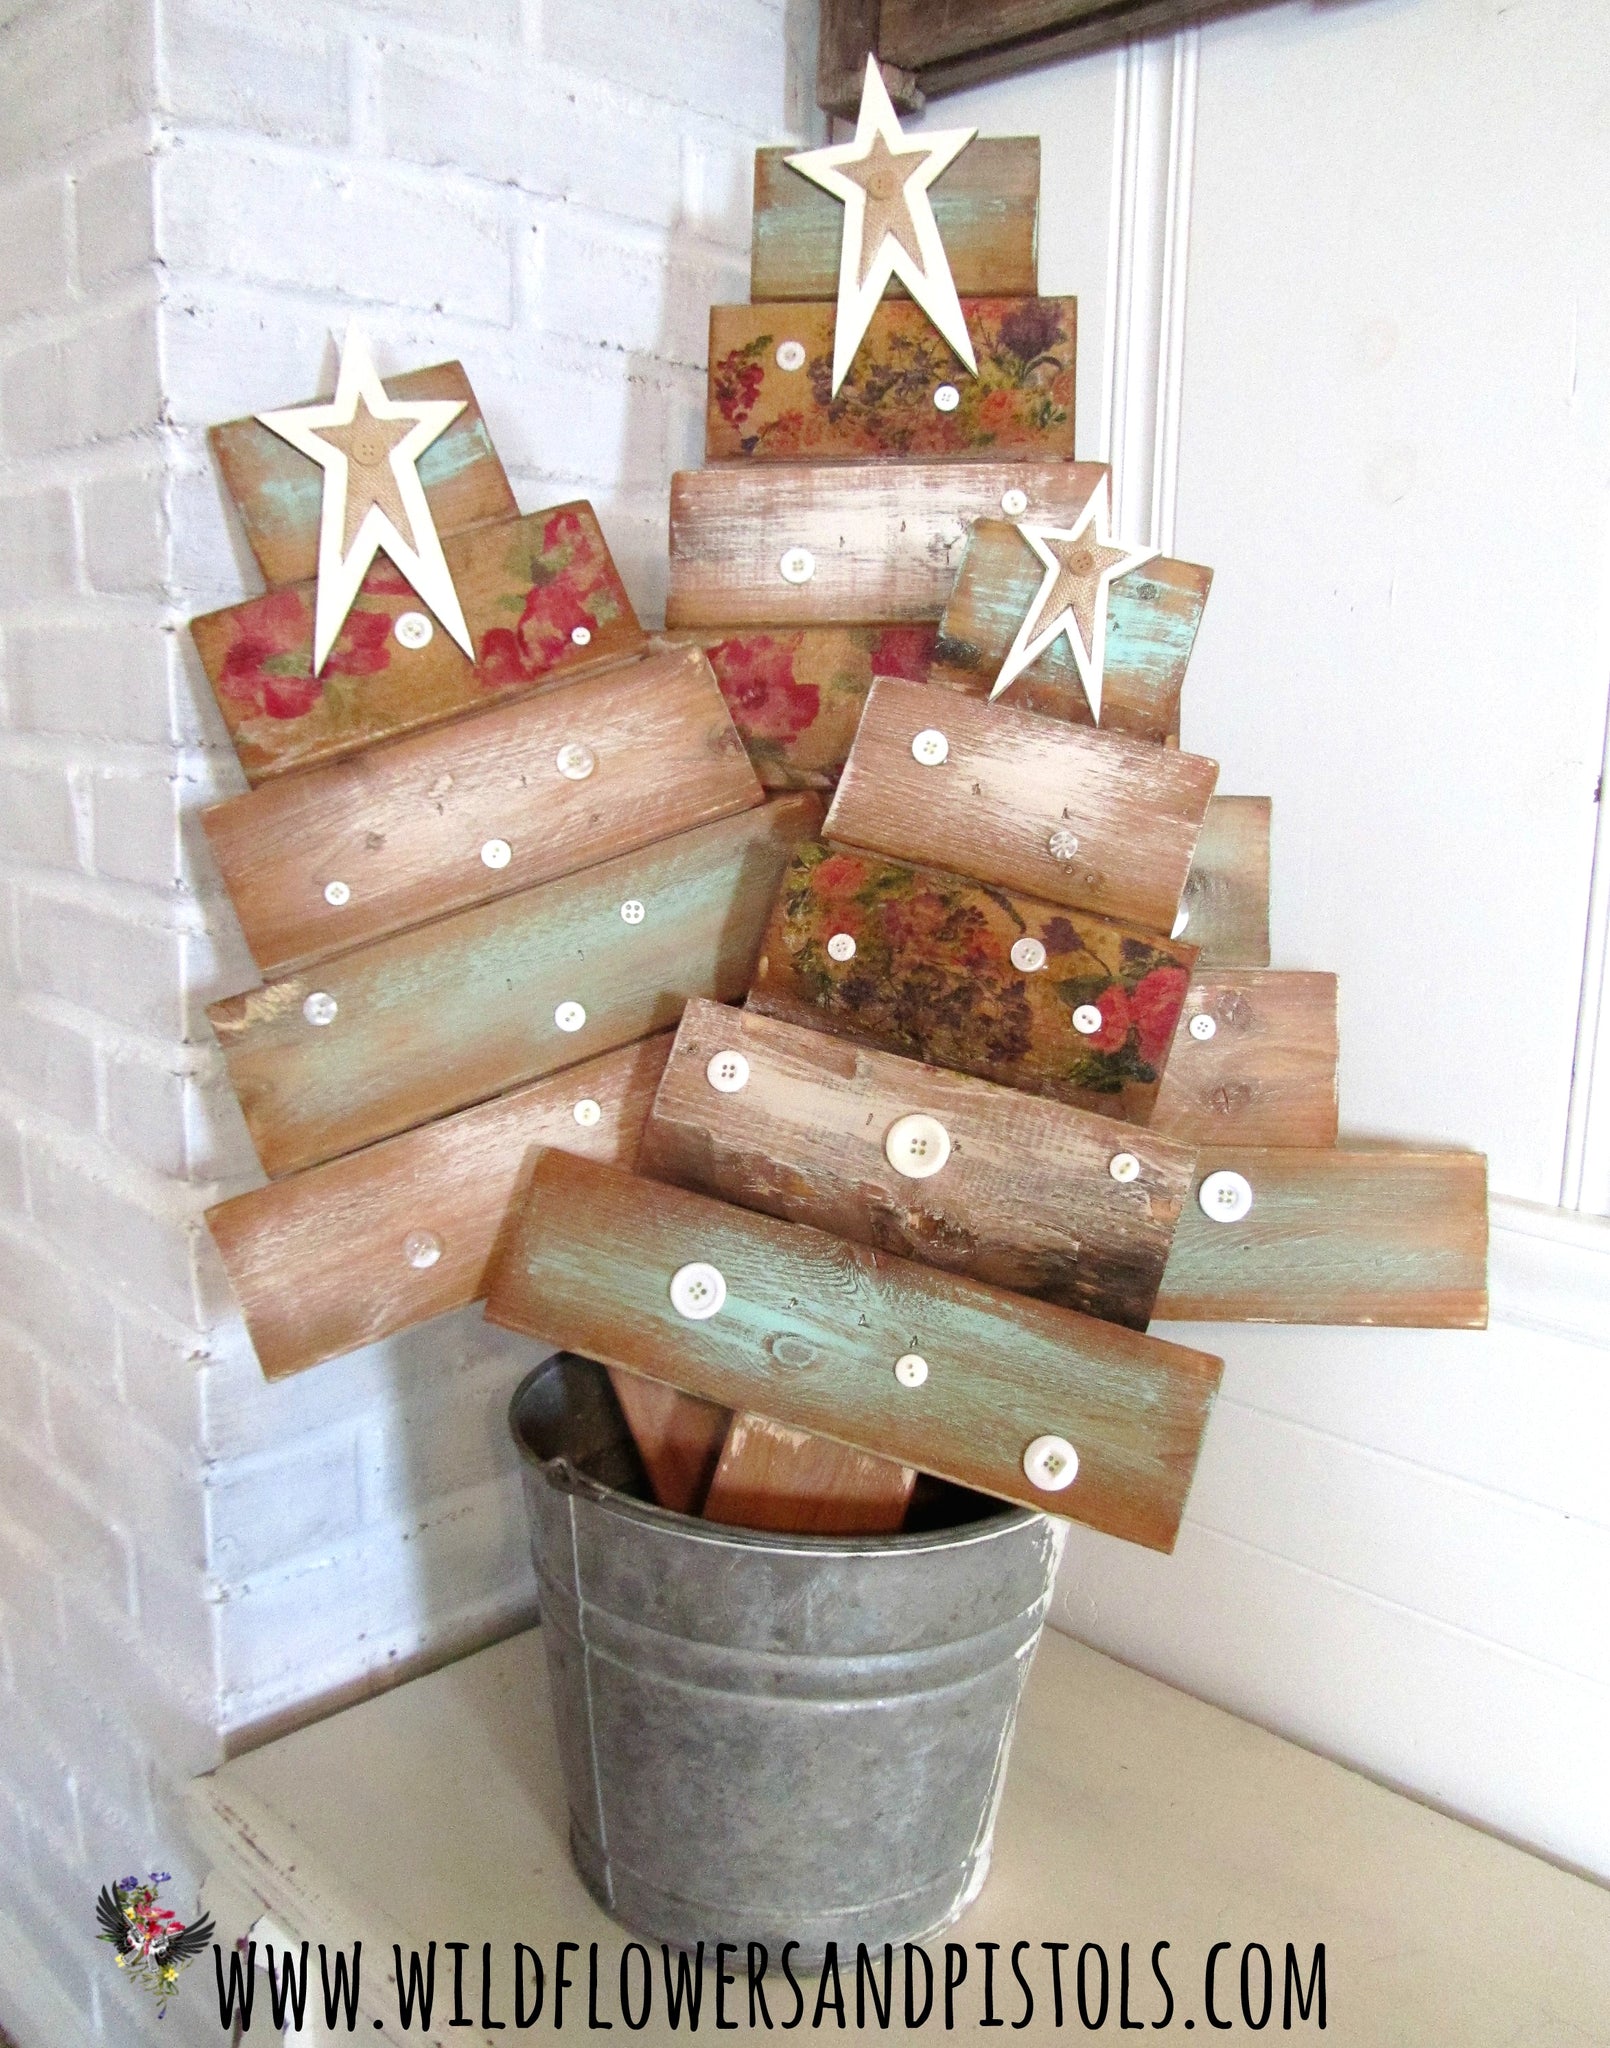
Pallet Wood Christmas Trees

I had seen some Christmas Trees on Pinterest that were made from reclaimed wood and old pallets and I thought they were cute. I wanted to give it a go but wanted to add my own flare to them. The ones I had seen were just a little too plain Jane for my taste. So, using pallet wood, mod podge, napkins, buttons and some Wildflowers & Pistols Milk Paint I created my version of the Pallet Wood Christmas Tree :)

First, you will want to disassemble your pallet. I already had a few pallet boards available from a pallet I had torn apart awhile back. When taking apart pallets I use a sawzall. I just cut right through the nails. I have found this to be the easiest and quickest way. Then you will want to decide how big you want your trees. I decided I wanted my largest tree to stand about 3 ft tall. I cut the back of the tree (or the trunk) to size. Then I just laid out the other boards that would be the 'branches' and cut them in descending sizes.
My exact measurements are as follows :
The biggest tree is 34" Tall and the branches are (from smallest to biggest or top to bottom)
6"
7.5"
9"
12"
16"
18.5"
24"
Medium sized tree is 30" tall and branches are
5"
7"
8"
10"
12"
14.5"
Smallest sized tree is 22" Tall and branches are
5"
6.5"
8"
9.5"
12.5"
Once you have everything cut to size just lay it all out and screw each piece into place.

If you don't want to take apart pallets or don't have access to any then you can definitely use new wood! If you want to use new wood but want it to look old you can use our W&P Milk Paint color Zora May! Just add more water (2-3 parts water to 1 part milk paint powder) when mixing the paint. This makes the paint act as a stain. The color of Zora May is a grayish brown color - perfect for making new wood look older and aged!

In the picture above you can see how I used new wood but used our Zora May milk paint as a stain to make the wood look older. On the right is the wood that is stained with Zora May the right is the plain, new, bare wood. The base or trunk of the tree is an actual piece of reclaimed, older piece of wood and the color of the Zora May stain matches very closely!

A full view of another tree stained with our Zora May milk paint color.
Now it's time to apply the napkins and paint your boards! I dry brush the boards using our W&P milk paint colors Nancy and Lucile.

You can see how I mod podge napkins here

Here ^ is a pic of what my trees look like after I've painted and sanded and distressed the napkins. Now I apply another coat of mod podge over my napkins.

Once the mod podge has dried I seal the trees using Helmsman Spare Urethane. This will allow you to use your trees outdoors and to keep them protected from the elements. This is a very important step if you want to use your trees outside! Be sure to use this in a well ventilated area. It has a bit of a strong odor!

While I wait for the trees to dry I get out my stars and I paint them white. You can find these at Hobby Lobby in their wood craft section. :)

Once the stars and trees are dried I attach the "ornaments". I use simple white buttons as the ornaments. I use a heavy duty super glue to attach the buttons to the boards. I also use the heavy duty super glue to attach a star to each tree.

Here is the finished product! Aren't they super cute!? I love them!

My Christmas trees have been super popular! They have been pinned to Pinterest and shared on other social media sites more than 346,000 times - and that's just from my post on HomeTalk. On Facebook alone they have been shared more than 146,000 times! Whaaatt?!?! Crazy talk! So many of you awesome folks have been ordering these and I've been shipping them out all over the U.S.

THANK YOU for sharing, for all the orders and for using my tutorial to create your very own trees!! If you use my tutorial to make your own I would LOVE for you to share them on our facebook page so I can see them! :)

** If you would like to order a set for yourself please visit our facebook page and send us a message! We would love to make you some! We also offer plain trees that we've made but that YOU can decorate! Here is the link to our facebook page --- https://www.facebook.com/TheHayloftCCC **
xoxo


Comments
Michelle said:
Thanks for the more In depth instructions
I can’t wait to try it.
Kim said:
I have to say those are just the cutest little pallet trees I have ever seen! I pinned this back in the beginning of September … have looked at it over and over!!! Glad I read all the way through.. guess I’m not alone in ?Loving these trees.. so I’m giving it a whirl tonight.. I will be sure to share… thank you for the great idea!
Pascale said:
Lovely, adorable, beautiful and cute!
gigi said:
Those are adorable!!! Thank you for the detailed instructions with all the measurements!
Jodi Richardson said:
These are so cute. I love the look you gave yours.