Blog
Ombre Dresser Show 'n' Tell

Here is what the dresser looked like to start with...
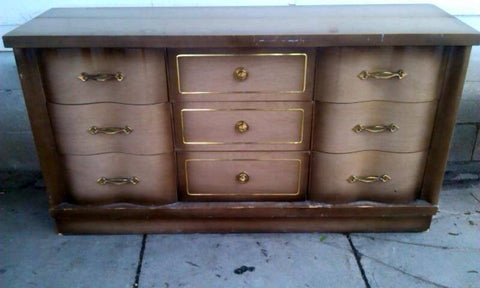
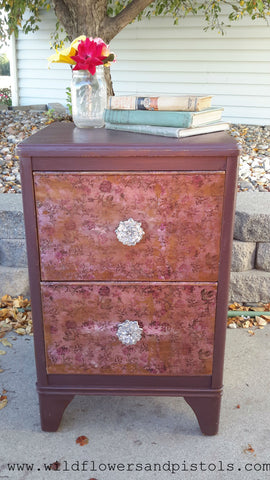
The darker edges that faded to light reminded of ombre and I knew I had to give it a try! And I gotta say, I LOVE how it turned out!
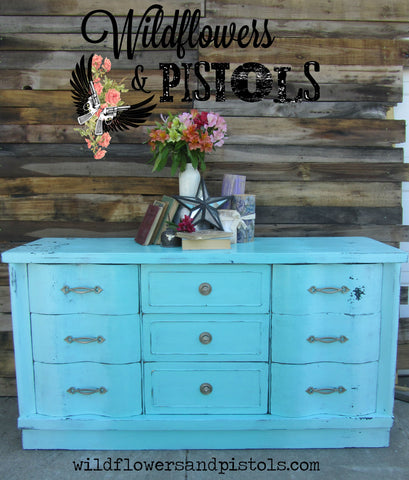
I used our Wildflowers & Pistols Milk Paint Base with No Pigment with an acrylic paint added in. To lighten the color I just added in some of our Priscilla color (bright white).

Even if you add in an acrylic paint to your milk paint base it can still crackle and chip! So, you can make ANY color of milk paint while still getting all the awesome characteristics of milk paint!
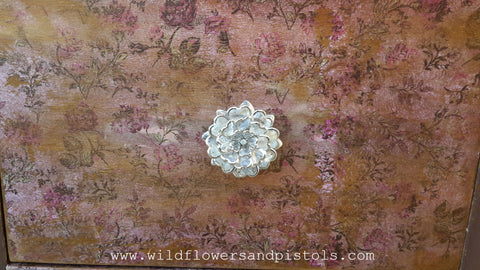
II updated the hardware using Rustoleums Rosemary paint. It's so pretty! Similar to a rose gold color. :)

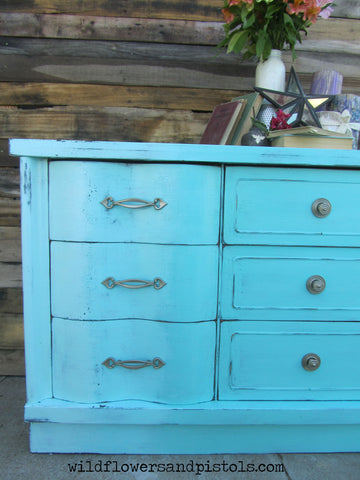
Check out all that amazing crackle I got on this piece!!
And not to mention all of that chipping!!

I'm seriously crushing over this ombre look! I love how the color fades!


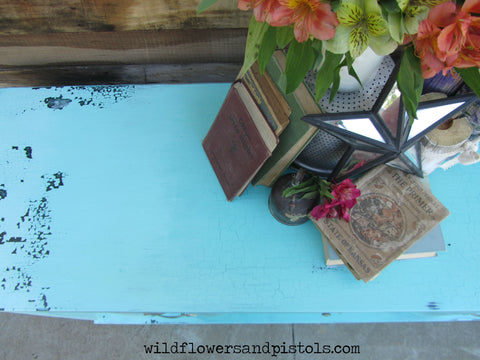
I love this color so much!!
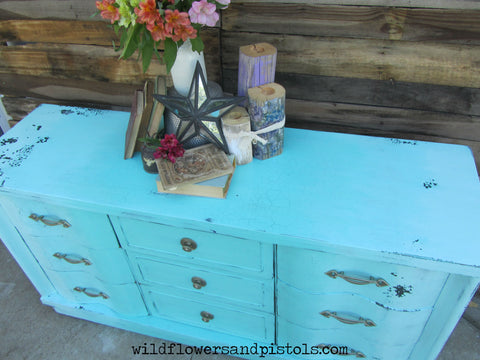
The colors remind me of the beach! This one is definitely going on my list of all time fave pieces that I've done! I love it so much! I hope you enjoy it and that it gets you inspired to create something fun and beautiful! :)
xo

Kitchen Table turned Sofa Table

Hey y'all! As promised, I have made this blog showing how I took an ordinary kitchen table and turned it into a sofa table. This was SO much fun to make!
Here is what the table looked like before -

It wasn't anything fancy. The table top was laminate and it slid apart to make the table bigger but it was missing the extra leaf. I had this table for over a year and I didn't really like it and I was lacking motivation and inspiration to redo it. Then, it just hit me! (you know.. about a year after picking it up ;) ) I decided I wanted to make this into a sofa table. So, here's what I did...
First, I removed the top. I just flipped it upside down and removed all of the screws that attached the table top to the base. Once I did that this is what it looked like..

This is obviously just a picture of one side of the tables base. But, this was now going to be the base for my sofa table. I just had to make a few modifications :)

I decided how deep I wanted the sofa table to be and I cut out the excess. In the picture above you can see that I just cut out a piece in the middle between both table legs. I repeated this same step on the other side of the tables base cutting and removing the same size of piece. I just used a hand saw to cut the wood.
Now, it was time to put each side back together!

I removed the excess piece. I held onto it because I was going to use it for the next step. I never waste any wood scraps ;) - I grabbed my wood glue and glued it back together. To hold it in place I clamped it together tightly. I let the glue dry. By this point it was getting late so I just left it like this over night.
The next morning I grabbed those two pieces of excess wood and...

I used the excess wood to help stabilize each side that I had cut and glued. I screwed it onto each new side of the tables base in the middle between each leg.
To cover the seem..
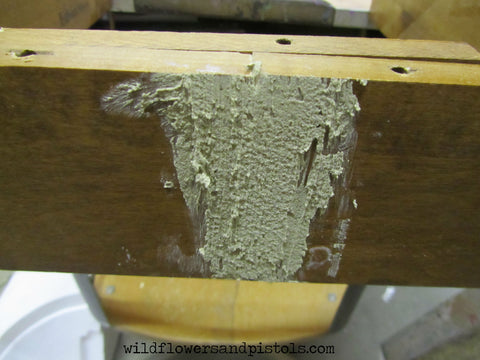
I used wood filler to help give each side a seamless look. Once the wood filler was dry I sanded it until it was completely smooth.
Now, I needed to attach the two base pieces together as one..

I cut two pieces of 1"x2"s and then screwed them to either side of the base to help stabilize and connect the base back together. (Also- I glued each base piece before attaching the 1"x2" boards then to cover the seem I applied wood filler. Then sanded smooth once dry.) The table was very sturdy!
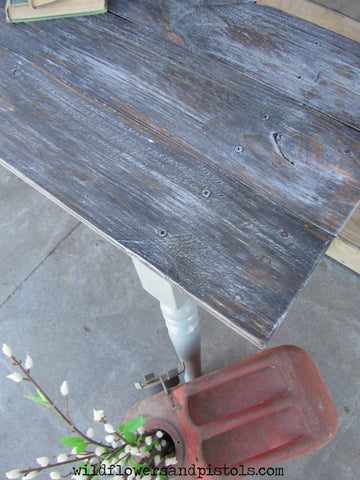
Now, it needed a new top!

I screwed down 3 boards of reclaimed wood. I ended up not having to cut or modify any of the 3 boards (amazingly enough!) After screwing each board down attaching it to the base I sanded each board until it was smooth. Then I stained them using a dark walnut color. I decided I wanted the wood to resemble barn wood so I grabbed some W&P Milk Paint- Pearl and I dry brushed it onto each board. Next, I painted the base! I decided to use a custom mix of W&P Milk Paint to create a unique color. This new paint color will be released very soon!!! :D
Here's what the final product looks like!

Isn't this color awesome!? It's kind of like a sea foam color with a hint of gray. I wish everyone could see this piece and color in person! These pics just don't do it justice!
I am SO happy with how the new table top turned out! (I'll be writing a blog tutorial on how I did it sometime soon!)


And just for good measure here's a side by side before and after pic :)

I hope y'all love this as much as I do! But, what I hope even more is that this will inspire you to create something beautiful and help give you the confidence to get started! :)
~Heather
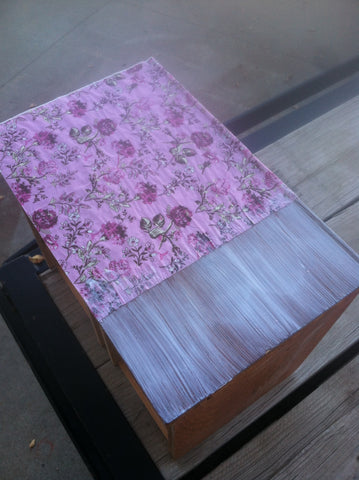
How to use Mod Podge & Napkins on Furniture


Heather
That's not my name!
Why did I change the names of my paint colors? Well, honestly most of the old paint names had no meaning to me…I didn't really connect with them. And I figured if I couldn't connect to them then other people probably didn't either. I wanted each color to take on its own life and to have a personality, if you will. My business’s new direction is based on being true to yourself, taking risks, embracing your free spirit. I wanted my paints to have names that are named after some of my favorite women, but I also wanted them to remind you of someone that you might know to give them their own spirit and personality.
Let me help you to get to know some of these fine women. :)
 Regina and Joy

Regina was my great grandmother. Regina was the older sister to Veronica. Their mother passed away when they were very young. Regina was 9 and Veronica was only 4-5. Her cause of death was lead poisoning that she received from an operation she had done. After that their father refused to see any doctors of any kind and he never remarried. Later in life Regina married my great grandfather and had 8 children. One of those children were named Jerry. He was sent to the Vietnam War where he lost his life at the young age of 21. This was very hard for Regina, as it would be for any mom. Before his passing, she always had this light about her and a sense of humor (or so I've been told), but after Jerry died that light had dimmed and the humor was replaced with sadness. This isn't to say that she was never happy, because she was. She had many blessings, but, she had been broken. One of those blessings was their youngest child, their only daughter, who would later become my grandmother. Her name is Joyce. She is a beautiful woman inside and out. She is ornery like her father and her light shines wherever she goes like her mother. She's also an amazing baker! Her dinner rolls and cinnamon rolls are famous in my hometown! My grandma is another strong woman in my life and so I’ve named a color after her, just as I’ve named colors in honor of my great grandma, Regina. My grandpa, John, has always called her "Joy.” Her favorite color also happens to be yellow so it couldn't have been more fitting for me to name one of my yellows, a color of light and happiness, Joy.
 Pearl
Pearl
Pearl is the middle name of my paternal grandmother. Linda Pearl - she might just be the most stubborn, strong willed, kind hearted woman I know. I can remember listening to her stories and opinions as she and my sisters would wash dishes in her kitchen. She would give us her ideas on everything from how best to keep sponges clean to the competence of the United States president. She has taught me that even women, and maybe especially women, ought to think for themselves. Pearls are admired for their natural beauty and I can’t help but admire my granny for the same reason. Also - the picture that is placed inside of the frame that represents this color is a picture of my granny and grandad. It's one of my favorites!
 Zora May
Zora May's real name was Missouri but everyone always called her Zora May. Which is kind of a fun insight at their accent.. One can assume that they pronounced Missouri as Missoura and that's why they called her Zora for short. Zora was my great great aunt. Unfortunately, I never met her and there aren't too many stories about her.. However, there is one story that was passed down by another aunt. She claimed that Zora was poisoned and killed by her second husband. Zora passed away at the young age of 44 and had only been married to her second husband for 2 years. This was never proven but it's a story of speculation that has been handed down from generation to generation. I wish I knew her true story. But, sadly all I know is that she had 12 children, died too young and carried a beautifully unique name.
 Lottie
Lottie's real name was Charlotte but everyone called her Lottie. This color was originally called 'Grandma's Quilt' because she made the quilt that hangs in my mothers living room. And one of the colors in the quilt is this one. The quilt was made from her old dresses. She would get a new dress each Christmas but wouldn't wear it until the one she wore everyday was worn out. She'd then put the old, worn out dress away and use it for quilts. She was a very small woman. Short and petite. She was said to be very sweet and caring but if you crossed her you'd definitely hear about it! With that being said, she didn't anger easily. She was like a volcano. It usually took you several mess ups before she exploded ;) One of my all time favorite family legends is about this tiny gal. There was what we call the Range Wars of the West. Family legend has it that these boys came riding in on their property. She stepped out of their sod house with her rifle and shot one of the man's hats clean off his head and threatened to go lower if they didn't leave. The men decided to go ahead and ride on out of there. She had this quiet independence about her and she was very feisty. She was tough and stubborn until the day she died. She passed away at 98 years old and outlived 5 of her children.
 Annie
Annie
Annie is named after Annie Oakley, one of my favorite women of all time! I'm a gun enthusiast myself. Unfortunately, I don't have as good a shot as her but I'm still pretty good if I do say so myself. ;) I have always been drawn to Annie Oakley because she was a feminist but would never admit to it. She was a woman of conviction but never had to shout it out. She lived her life without fear. She wasn't afraid to live by her beliefs, she wasn't afraid of what people thought of her, she wasn't afraid to shoot someone, she wasn't afraid to be herself, and she also wasn't afraid to love. Here is my favorite quote of hers.. "I ain't afraid to love a man, but I ain't afraid to shoot him either."
And now onto our NEW colors!
 Esmeralda
Esmeralda was chosen because this color reminds me of a gypsy and what gypsy did I grow up with and love? You guessed it! Esmeralda from The Hunch Back of Notre Dame. (the disney version) This color immediately made me think of a gypsy because it's the color of Esmeralda's eyes and her corset in the movie. Gypsy life can be very appealing. Living by your own terms and a life full of wanderlust.
 Lucile
Lucile was my aunt. She was actually my great aunt, but we always called her Aunt Cile. She passed away a couple of years ago and I miss her dearly. It wasn't until her passing that we learned her first name was actually Emma, so she was a bit mysterious. She was a teacher in a small one-room school house for awhile, and although she never had any kids of her own, all of her nieces and nephews (everyone from my grandpa to my own daughter) were her children. She was vibrant and fun and she made THE best strawberry pie! She was very involved in her community and was the best kind of friend that you could ever ask for. When she became older and moved into the assisted living home she knew everyone's name within a few weeks and when her eyesight went she knew everyone by their voice. I can remember when she held my sister’s son for the first time, she cried because she felt so blessed to be holding a great-great nephew. She was amazing like that. There was never any doubt how much she loved her family and friends.
 Annaleigh
Annaleigh Joy is my daughter. My brown-eyed girl was named for my granddad’s mother, Anna, and my maternal grandmother, Joyce. As you can see, I’ve made a habit of honoring the strong women in my life. Annaleigh’s favorite color is purple. Well, she says all colors are her favorite, except white! She is my mini me which is both a blessing and a curse. She has the MOST beautiful imagination and I pray she never loses it! She's my barefoot, free spirited, sensitive, sassy little girl. I wouldn’t be doing my girl justice if I didn’t also mention a trait of hers that's been passed down from generation to generation. The girl is stubborn, not unlike her mama or our other female relations. What can I say? We come by it honestly!
I will continue to introduce you to some pretty great women as time goes on, especially as we release new paint colors!! But for now, I wanted to share a few of my favorite and most influential ones. We are in very good company here! These women were each the original Wildflowers & Pistols.
